
Configuring CKEditor in Craft CMS
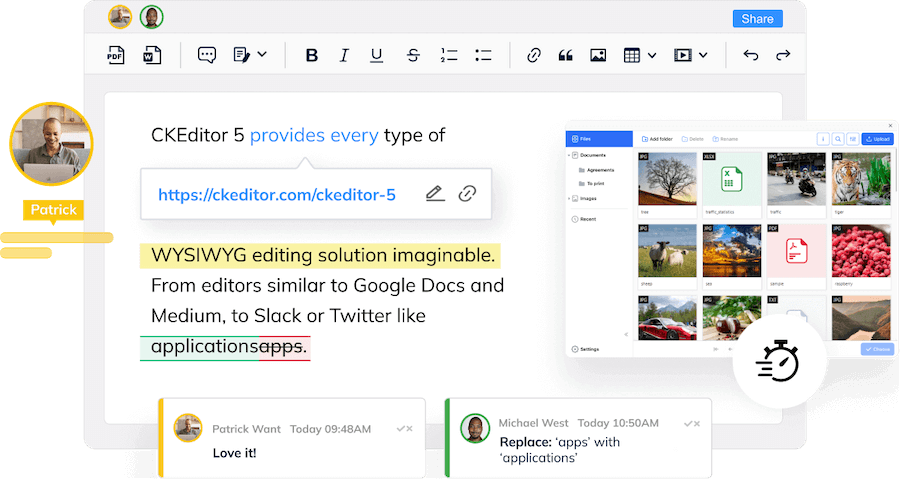
Where would content management systems be with out rich text editors? Sometimes known as WYSIWYG (what you see is what you get), A rich text editor is an interface or input field for text editing, that includes advanced styling options like heading levels, bold, italic, and bullet points. You can also embed images, hyperlinks, and other rich media (such as videos) into a rich text editor.
I'm not sure how many content editors know basic html but I'm pretty sure most don't want to bother. I live for code and I know there have been a few times I got lazy and forgot a very important </a> to end a link. Suddenly the rest of my paragraph is clickable. When using a rich text editor you can easily see where links (and all html tags) start and end because what you see in the editor field is what you get on the front end of the site.
Craft CMS CKEditor Plugin
In 2021 Craft CMS released a plugin for rich text editor CKEditor. It has a lot of cool features like accessibility add-ons and extensive keyboard support. Then, in 2023, Craft revamped the plugin for better integration. It let users link to entries and insert images using transforms. The new update also introduced reusable config options to make the editor work exactly as needed for each project.
I've been working with the config on a few projects and want to share some common setups I've been reusing. You can use either json formatting or return a JavaScript object to add your config options to the default config. I'll share an example with everything combined at the bottom of the page.
CKEditor Config: Link
The link feature lets you insert hyperlinks into your content and provides a UI to create and edit them. You could force every external link to open in a new tab:
{
  "link": {
    "addTargetToExternalLinks": true
  }
}
While I do believe each external link should open in a new window I like to have control. The following config adds a toggle to the link box to indicate if the browser open in a new tab.
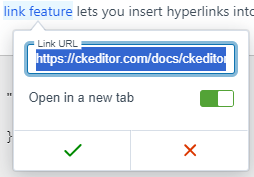
I've also added the rel attributes:
{
  "link": {
    "decorators": {
      "openInNewTab": {
        "attributes": {
          "rel": "noopener noreferrer",
          "target": "_blank"
        },
        "label": "Open in a new tab",
        "mode": "manual"
      }
    }
  }
}
Link decorators add additional attributes. I haven't use it but I just found the config to always download pdfs.
CKEditor Config: Style
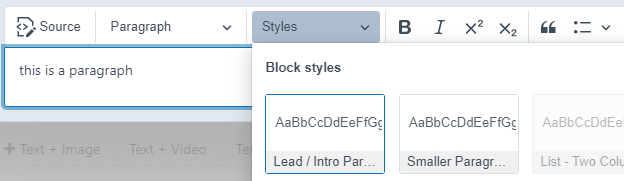
The style feature lets you apply pre-configured styles to elements in your content. It works by adding one or more CSS classes to an element to change its appearance or add semantic information. Configuring the styles feature takes two steps. First, you need to define the styles in the configuration file, for example:
{
  "style": {
    "definitions": [
      {
        "classes": [
          "lead"
        ],
        "element": "p",
        "name": "Lead \/ Intro Paragraph"
      },
      {
        "classes": [
          "smaller"
        ],
        "element": "p",
        "name": "Smaller Paragraph"
      },
      {
        "classes": [
          "button"
        ],
        "element": "a",
        "name": "Button (regular)"
      }
    ]
  }
}
Then, define the corresponding CSS styles for the Craft editor:
.ck-content p.lead {
    font-size: 1rem;
}
.ck-content p.smaller {
    font-size: 0.6rem;
}
.ck-content a.button {
    text-decoration: none;
    background: blue;
    color: white;
}
What I really like is that the Styles dropdown will only let user select a style based on the element.
CKEditor Config: Images
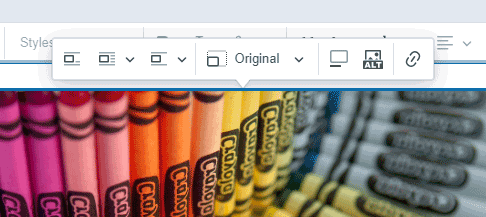
I found this last section tricky because there's just so much happening with it. The image styles feature lets you adjust the appearance of images. It works by applying CSS classes to images or changing their type from inline to block or vice versa.
In this example I had to change default class names to fit with the template that was used on the front end. Besides the style options I also configured the image tool bar:
{
  "image": {
    "styles": {
      "options": [
        {
          "name": "inline"
        },
        {
          "className": "image--left",
          "name": "alignBlockLeft"
        },
        {
          "className": "image--center",
          "name": "alignCenter"
        },
        {
          "className": "image--right",
          "name": "alignBlockRight"
        },
        {
          "className": "image--floatLeft",
          "name": "alignLeft"
        },
        {
          "className": "image--float",
          "name": "alignRight"
        },
        {
          "className": "image--circle",
          "icon": "<svg><path or group or whatever is needed></svg>",
          "modelElements": [
            "imageBlock",
            "imageInline"
          ],
          "name": "imageRound",
          "title": "Round"
        }
      ]
    },
    "toolbar": [
      "imageStyle:inline",
      {
        "defaultItem": "imageStyle:alignLeft",
        "items": [
          "imageStyle:alignLeft",
          "imageStyle:alignRight"
        ],
        "name": "imageStyle:customWrapText",
        "title": "Wrap Text"
      },
      {
        "defaultItem": "imageStyle:alignBlockLeft",
        "items": [
          "imageStyle:alignBlockLeft",
          "imageStyle:alignCenter",
          "imageStyle:imageRound",
          "imageStyle:alignBlockRight"
        ],
        "name": "imageStyle:customBreakText",
        "title": "Break Text"
      },
      "|",
      "transformImage",
      "|",
      "toggleImageCaption",
      "imageTextAlternative",
      "|",
      "linkImage"
    ]
  }
}
You can see the svg in the animated gif below. If case you were wondering, yes the linkImage included the new tab toggle.
CKEditor Config: All Together
Below is all my config together in 1 place. I've removed some of the detail but you can grab it above:
{
  "code": {
    "indentSequence": "  "
  },
  "image": {
    "styles": {
      "options": [
        {
          "name": "inline"
        },
        ...
      ]
    },
    "toolbar": [
      "imageStyle:inline",
      ...
      "linkImage"
    ]
  },
  "link": {
    "decorators": [
      {
        "attributes": {
          "target": "_blank"
        },
        ...
      }
    ]
  },
  "style": {
    "definitions": [
      {
        "classes": [
          "lead"
        ],
        "element": "p",
        "name": "Lead \/ Intro Paragraph"
      },
      ...
    ]
  }
}AmandaLutz
Toronto, Canada
amanda.lutz@gmail.com
© 2026 - Amanda Lutz * Web Developer